Create Thumbnails with Preserved Edges Using Python Image Library
Introduction
You're probably familiar with this scenario: you upload your perfect 3:4 image to a website, only to find the thumbnail gets cropped so severely the result is either ugly or meaningless, or both.
I was recently working on adding structured data metadata to a Wagtail site in order to include Google enhancements. For the particular data type, Google requires an array of thumbnails with differing aspect ratios: 16x9, 4x3, and 1x1. It's a rare image that works across all of these. If a single image is used for all three formats, information will be lost due to cropping. One image for each format would require not just a change in the model but also a lot of extra work in creating three times the images.
What was lacking was a mechanism for creating thumbnails that presented the whole image without cropping or stretching while meeting the thumbnail dimension requirements.
Enter the Python Image Library (Pillow or PIL) which has many rich features for programmatic image processing.
The example on this page demonstrates how to make thumbnails, but it could easily be adapted to provide an image filter that adds EXIF data, watermarks, copyright, or branding to rendered images, for example.
If you're on Instagram, you'll be aware of this problem already. Your image will be cropped if it doesn't fit one of their predetermined aspect ratios. If you use Photoshop, here's a set of actions that you can combine with the Image Processor that will convert your images to Instagram's square (1080x1080), landscape (1080x608), portrait (1080x1350) and story (1080x1920) formats with padding to prevent cropping after upload.
Creating the Thumbnail in Pillow
Requirements
For my purpose, I only needed to supply a width and a height to resize the image to. The thumbnail I produce is padded with a transparent background to let external factors take care of how this is displayed.
You might want to alter the code to take background colour and transparency as parameters as suits your needs.
The Wagtail image template tag has a background colour filter already which is compatible with the end result here.
The Process
The technique will be to create a blank, transparent tile of the required size and then scale the image to fit completely in that tile. The scaled image is then pasted into the blank tile so that the centre of the two images coincide with any excess space evenly distributed to either side of the scaled image.
Create a Blank, Transparent Image
Use the new() method of the PIL Image model to create a blank canvas of a given size, specified as a tuple of (width, height) in pixels, and colour, specified as an RGB tuple (ie (R, G, B)).
A white tile 500px wide and 250px high is created with tile = Image.new('RGB', (500, 250), (255, 255, 255)).
If you were to paramatise the colour, you could make use of the getcolor() method in PIL.ImageColor to convert hex codes to RGB tuples.
For example, ImageColor.getcolor('#02b875', "RGB") returns (2, 184, 117)
Transparency is controlled by the alpha value which is actually given as opacity - how opaque a layer is. An alpha value of 0 is completely transparent, an alpha value of 100 is completely opaque. The PIL Image model includes the method putalpha() to set this, so we can set the tile to transparent with tile.putalpha(0).
Some of the PIL Image model methods modify the instance in-place when using instance.method(), they do not return a value.
The result of new_tile = tile.putalpha(0) is that tile has its alpha value set to zero while new_tile is the None value. The paste() method has similar behaviour.
To apply the method and save to a new instance, first copy the image with the Image.copy() method then apply the method.
Do not just assign the image variable to another as this is just a pointer to a memory location, so any changes you make to one will happen to the other:
tile = Image.new('RGB', (500, 250), (255, 255, 255))
tile.putalpha(80) tile has alpha 80
new_tile = tile.copy()
new_tile.putalpha(50) tile has alpha 80, new_tile has alpha 50
new_tile = tile.putalpha(70) tile has alpha 70, new_tile is None
new_tile = tile
new_tile.putalpha(70) both tile and new_tile have alpha 70
Resize the Image
As you'd expect, PIL has a resize() method which takes size, resample method, crop box and an optimisation factor. We'll just use size here, which is again given by a 2-tuple of width and height.
To fit the original image inside the blank tile, we need to compare the aspect ratios of both images.
- If the thumbnail aspect ratio is more narrow than the original image, the resized image will be full-width with height scaled proportionally.
- If the thumbnail aspect ratio is wider than the original image, the resized image will be full-height with width scaled proportionally.
Of course, if the requested thumbnail size is the same aspect ratio as the original, we can just resize and be done.
Combine the Two Images
PIL has a paste() method to place one PIL image into another at a given starting pixel coordinate.
For example, we can use PIL to paste image B onto image A 100px from the top and 200px from the left with A.paste(B, (100, 200)).
We'll be pasting our resized image onto our blank tile with the paste coordinate such that the two are centred. How we do that depends on the ratio once again:
- If the thumbnail aspect ratio is more narrow than the original image, the resized image will be pasted on the left margin (x=0). The y value will half the difference between the tile height and the resized image height.
- If the thumbnail aspect ratio is wider than the original image, the resized image will be pasted on the top margin (y=0). The x value will half the difference between the tile width and the resized image width.
The Code
The thumbnail method below takes an image, width and height and (using the process described above) outputs a transparent tile of that width and height with the image scaled and centred to fit on the tile without cropping.
I've added my code to my 'core' app - adjust for your own site.
from PIL import Image
from wagtail.images.image_operations import FilterOperation
from willow.plugins.pillow import PillowImage
from willow.registry import registry

def thumbnail(image, width, height):
    img = Image.frombytes('RGB', image.get_size(), image.to_buffer_rgb().data, 'raw')
    original_aspect = img.width/img.height
    thumbnail_aspect = width/height

    if original_aspect == thumbnail_aspect:
        # return resized image
        return PillowImage(img.resize((width, height)))
    else:
        # create transparent background size of requested thumbnail
        thumb = Image.new('RGB', (width, height), (255, 255, 255))
        thumb.putalpha(0)

        if thumbnail_aspect < original_aspect:
        # thumb aspect ratio is more narrow than original
            # scale as proportion of width
            resized_original = img.resize((width, round(img.height * width/img.width)))
            # paste into background with top/bottom spacing
            thumb.paste(resized_original, (0,(height-resized_original.height)//2))
        else:
        # thumb aspect ratio is wider than original
            # scale as proportion of height
            resized_original = img.resize((round(img.width * height/img.height), height))
            # paste into background with left/right spacing
            thumb.paste(resized_original, ((width-resized_original.width)//2, 0))

        return PillowImage(thumb)
Code Notes
As this will be Wagtail code, I'm assuming the incoming file will be a Willow PillowImage which needs to be converted to PIL format.
If your passing another image type, you may need to use another method, or use Image.open('filename') to read an image from disk.
img = Image.frombytes('RGB', image.get_size(), image.to_buffer_rgb().data, 'raw')I convert the PIL image back to a Willow PillowImage, essentially reversing the line above. Adjust as you need.
return PillowImage(thumb)Example Thumbnails
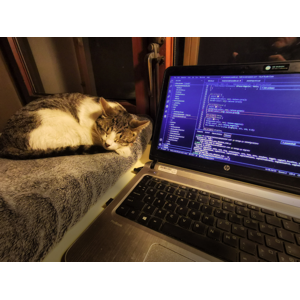
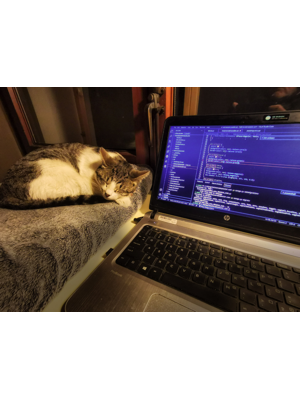
With help from my trusty assistant Janis, the following shows an original 4x3 image with 3 generated thumbnails. Image size is shown by the grey border showing the transparent background where the resized image dimensions do not match the thumbnail dimensions.

Registering thumbnail as a Wagtail Image Filter
Add to the Willow Registry
We've defined the method that produces the image we want, but how to access this method to render images and produce renditions in the usual Wagtail way?
As I touched on above, Willow is a library used by Wagtail that combines the functionality of multiple Python image libraries into one API.
Our goal is to be able to request thumbnails in templates such as
{% image pg.banner_image thumbnail-500x250 bgcolor-4582ec as img %}Or in code by using
tn1x1 = img.get_rendition('thumbnail-500x500|format-png')To register the thumbnail method so that it can be used in as a Wagtail image filter, we need to register it in the willow.registry. Beneath the thumbnail method above, add the following line:
registry.register_operation(PillowImage, 'thumbnail', thumbnail)Create a Class to Call the thumbnail Method
It's a bit of a two step process now - we need to register the Willow method as a Wagtail image operation. A Wagtail image operation is a class with a construct method that parses any given parameters and a run method passes those into the Willow method.
Plagiarising the code for the built-in fill image operation, the operation will take a parameter of width and height separated by an 'x', for example thumbnail-500x500.
class ThumbnailOperation(FilterOperation):
    def construct(self, size):
        width_str, height_str = size.split("x")
        self.width = int(width_str)
        self.height = int(height_str)

    def run(self, willow, image, env):
        return willow.thumbnail(self.width, self.height)
All that's left now is the hook to register the Wagtail image operation. To your wagtail_hooks.py, add the following:
from wagtail import hooks
from .thumbnails import ThumbnailOperation

@hooks.register('register_image_operations')
def register_image_operations():
    return [
        ('thumbnail', ThumbnailOperation)
    ]
Using the thumbnail Image Filter
There are two routes normally taken to get image renditions in wagtail:
Templates
We can call the filter from the standard wagtail image template tag found in wagtailimages_tags, assign the output to a variable and access the properties in the standard Wagtail methodology.
To create a 400x200px thumbnail of a page's search_image:
{% image self.search_image thumbnail-400x200 as img %}
<img src="{{ img.url }}" alt="{{ img.title }}">
This will give us a .jpg image with white spacing by default.
We can also combine the thumbnail filter with other filters, such as bgcolor to change the padding colour (we can do this because we left the background as a transparency in the thumbnail module).
{% image self.search_image thumbnail-400x200 bgcolor-4582ec as img %}And choose the format of the rendered image such as webp or png (choose the latter to preserve the transparency):
{% image self.search_image thumbnail-400x200 format-webp as img_webp %}
{% image self.search_image thumbnail-400x200 format-png as img_png %}
Janis is on standby once again to demonstrate some of these possible combinations:


Template Tags
The Wagtail image.get_rendition() method works much the same way as the image template tag above with one important difference: your filters must be separated by a pipe | character and not a space.
If your template image call was:
{% image pg.banner_image thumbnail-400x200 bgcolor-02b875 format-webp as img_webp_colour %}Then your get_rendition equivalent would be:
img_webp_colour = pg.banner_image.get_rendition('thumbnail-400x200|bgcolor-02b875|format-webp')Back to my original requirement - to add an array of thumbnails of differing ratios to page metadata: 16x9, 4x3, and 1x1.
For this, I pass an image to a template tag that returns the three thumbnails as a dictionary.
Since I was supplying image urls for external use, I needed to use the full url rather than the relative url. For the requirement, my template tag became:
from django import template

register = template.Library()

@register.simple_tag()
def get_google_thumbnails(img):
    return {
        'tn1x1': img.get_rendition('thumbnail-500x500|format-png'),
        'tn4x3': img.get_rendition('thumbnail-500x375|format-png'),
        'tn16x9': img.get_rendition('thumbnail-500x281|format-png'),
    }
And my metadata template:
{% load structured_data_tags %}
{% get_google_thumbnails self.search_image as thumbnails %}

<script type="application/ld+json">
  {
    ....
    "image": [
        "{{ thumbnails.tn1x1.full_url }}",
        "{{ thumbnails.tn4x3.full_url }}",
        "{{ thumbnails.tn16x9.full_url }}"
        ],
    ....
  }
</script>
That's it, mission accomplished. We're able to create scaled renditions of our Wagtail images that preserve the full frame no matter the output aspect ratio.
Conclusion
In this article, I introduced the Python Image Library (otherwise known as PIL or Pillow).
- I walked through creating a function using some of the PIL basics to produce a scaled image on a transparent background.
- We used this function to create an image filter that could be used with the Wagtail image template tag and the
get_renditionmethod to create thumbnails directly from the Wagtail image library. - Finally, I showed some ways you might use these both directly in templates, or in template tags.
