
Wagtail: Extending the Draftail Editor Part 4 - Custom Lists
Introduction
I started this as an afterthought for the second part on block styles and realised it required some lengthy explanation.
It's next to impossible to find information on creating your own lists in Draftail, and what I have found has been through accident, code trawling and experimentation.
The discussion below is based purely on that, so if you do find a supported way to customise lists without creating a brand new entity, I would love to hear about it.
Registering a Custom List Style
Using the List Handlers
Much like the BlockElementHandler and InlineStyleElementHandler methods, there are two for registering lists:
from wagtail.admin.rich_text.converters.html_to_contentstate import ListElementHandler, ListItemElementHandlerYou use ListElementHandler to register your <ul> or <ol> styled element. <dl> is not supported. To call it and have a supported list created in the editor, it must be called with either ListElementHandler("unordered-list-item") or ListElementHandler("ordered-list-item").
Use ListItemElementHandler for your styled <li> elements. This is called without any parameters.
So a db_conversion definition might look like the following:
db_conversion = {
    "from_database_format":  {
        "ul[class='custom-list-wrapper']": ListElementHandler("unordered-list-item"),
        "li[class='custom-list']": ListItemElementHandler(),
    },
    "to_database_format": {
        "block_map": {
            type_: {
                "element": "li",
                "wrapper": "ul class='custom-list-wrapper'",
                "props": {
                    "class": "custom-list"
                }
            }
        },
    }
}
The Problem
This will render fine on the front-end with
<ul class="custom-list-wrapper">
    <div class="custom-list" data-block-key="...">Item #1</div>
    <div class="custom-list" data-block-key="...">Item #2</div>
    <div class="custom-list" data-block-key="...">Item #3</div>
</ul>
However, in the editor, no custom style is applied, the custom list looks like any other unordered list with the same bullet style as normal.
This is because, in the editor, the <ul> is formatted with public-DraftStyleDefault-ul and the <li> with Draftail-block--unordered-list-item public-DraftStyleDefault-unorderedListItem public-DraftStyleDefault-reset public-DraftStyleDefault-depth0 public-DraftStyleDefault-listLTR (!!). The custom classes we registered with don't make it into the editor.
A Workaround (with limitations)
What if you call ListElementHandler with your own string?
You won't throw an error, but what will happen is that, in the editor, your <ul>/<ol> will be missing completely while the <li> elements will be rendered as <div> elements instead.
Your front-end will still be rendered correctly, but in the editor, you've lost your list styling (you can't apply the ::marker pseudo element to a <div> element), and also list behaviour: you can't nest list items, and each element must have the style applied to it (you can't continue the list by simply pressing enter).
This is the same behaviour that happens if you just call BlockElementHandler for your <li> element and register your <ul> as a wrapper.
For example:
db_conversion = {
    "from_database_format":  {
        "li[class='custom-list']": BlockElementHandler (_type),
    },
    "to_database_format": {
        "block_map": {
            type_: {
                "element": "li",
                "wrapper": "ul class='custom-list-wrapper'",
                "props": {
                    "class": "custom-list"
                }
            }
        },
    }
}
Rendering the Custom List in the Editor
Looking at the rendered code, each list item element is an <li> element with css class Draftail-block--type as for a normal block. Nested in that is another <div> element with css class public-DraftStyleDefault-block. There's no <ul> element wrapping the list items in the editor however.
<li class="Draftail-block--custom-list public-DraftStyleDefault-reset public-DraftStyleDefault-depth0
    public-DraftStyleDefault-listLTR" data-block="true" data-editor="5vqca" data-offset-key="bctdk-0-0">
    <div data-offset-key="bctdk-0-0" class="public-DraftStyleDefault-block public-DraftStyleDefault-ltr">
        <span data-offset-key="bctdk-0-0">
            <span data-text="true">Lorem ipsum dolor sit amet....</span>
        </span>
    </div>
</li>
We can set a ::before pseudo class to our custom type to display our styled bullet, but this will place it on its own line. To fix that, we target the inner <div> to set the before and add some css to mimic the indented paragraph.
I'll set out how to do this in the example below.
Example: Custom List Style with Check Mark Bullets
Before I continue, in case you skipped the sections before, there are a couple of limitations with this:
- This will only let you create a single level list, no nested/multi-tiered lists are possible with this method.
- The list style must be applied to each element, it won't continue the list when pressing enter. The easiest usage is to enter all the list items in the editor then apply the list with all items selected.
Your editor features must include 'ol' or 'ul' (depending on which you use) as well as the custom list to render correctly in the editor. Without this, the editor will insert a blank line above the list when it next reloads after saving the page. The examples below both make use of 'ul' only.
Add the front end styling
I'll need two css classes here, one for <li> (check-list) and one for the <ul> (check-list-wrapper). Additionally, I'll create a ::marker pseudo class to add the bullet icon. I'm using the unicode character \1F5F9 which renders 🗹:
.check-list {
  margin-bottom: 0.1em;
}
.check-list::marker {
  content: '🗹';
  letter-spacing: 0.5em;
}
.check-list-wrapper {
  list-style: none;
}
If you wanted to apply a style to the list as a whole (such as padding, background colour etc.), then the wrapper class is a good place for this. I'll be doing this in the next example.
Register the custom list as a feature
I'll use the register_block_feature method I defined in Part 2 of this series to register the custom list:
@hooks.register('register_rich_text_features')
def register_checklist_feature(features):
    register_block_feature(
        features=features,
        feature_name='checklist',
        type_='checklist',
        description='Check List',
        css_class='check-list',
        element='li',
        wrapper="ul class='check-list-wrapper' role='list'",
        icon="tasks"
    )
If you just want to use the standard code from the Wagtail docs, your db_conversion dictionary should look like the following:
def register_checklist_feature(features):
    ....
    db_conversion = {
        "from_database_format":  {
            "li[class='check-list']": BlockElementHandler(type_),
        },
        "to_database_format": {
            "block_map": {
                type_: {
                    "element": "li",
                    "wrapper": "ul class='check-list-wrapper' role='list'",
                    "props": {
                        "class": "check-list"
                    }
                }
            },
        }
}From the MDN web docs
"Safari will not recognize an ordered or unordered list as a list in the accessibility tree if it has a list-style value of none. This behaviour is intentional and not considered a bug."
Since we're setting our <ul> style to none to override the bullet style, I'm adding role="list" to the wrapper definition to restore the list semantics.
Make sure you've added 'checklist' to your editor's features list and, once you've restarted, you'll see the check mark list icon on the toolbar.
Define the Draftail editor styling
If you style any lines at this point, you won't see any styling happening in the editor. In your editor or admin css, we need to add the following classes:
li.Draftail-block--checklist {
    margin-left: 0 !important;
}
li.Draftail-block--checklist > div.public-DraftStyleDefault-block {
    padding-left: 2em;
}
li.Draftail-block--checklist > div.public-DraftStyleDefault-block::before {
    content: '🗹';
    padding-right: 1em;
    margin-left: -2em;
}- The first removes the default left margin for list item elements, just my preference.
- Next, we add a left padding to the nested
<div>to nudge the text to the right. - Lastly, the
::beforepseudo element adds the check mark bullet point. There's a negative margin to complement the padding in the parent element we just added, plus some padding for spacing.
Now in the editor, with a list of a couple of items, it looks like the following:
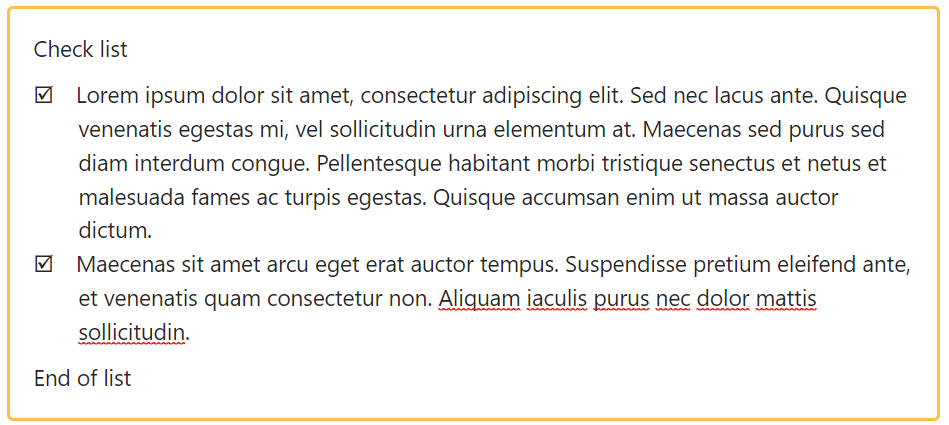
The custom list renders on the front end as:
Check list
- Lorem ipsum dolor sit amet, consectetur adipiscing elit. Sed nec lacus ante. Quisque venenatis egestas mi, vel sollicitudin urna elementum at. Maecenas sed purus sed diam interdum congue. Pellentesque habitant morbi tristique senectus et netus et malesuada fames ac turpis egestas. Quisque accumsan enim ut massa auctor dictum.
- Maecenas sit amet arcu eget erat auctor tempus. Suspendisse pretium eleifend ante, et venenatis quam consectetur non. Aliquam iaculis purus nec dolor mattis sollicitudin.
End of list
If you inspect the list, you'll see it's been rendered with:
<ul class="check-list-wrapper" role="list">
    <li class="check-list" data-block-key="...">....</li>
    <li class="check-list" data-block-key="...">....</li>
</ul>
Example: Using a Wrapper to Group Consecutive Blocks of the Same Type
In the final example I'll show how to make use of the wrapper attribute to group consecutive blocks of a type together and apply some styling to the group as a whole.
This needn't apply only to list items. My use case for the example is to create a code block where the lines of code are tight together, but an overall padding and margin is added around the group of blocks.
To do this, I add a <ul> wrapper to the block_map with the necessary CSS styling.
I would have used a <div> tag for this purpose, since we're not creating an unordered list. When I used that, it would render fine, however each save of the page would inject a nested <div> containing a line break <br> tag above each group of code blocks.
From this, I can only guess that only certain tags are accepted as wrappers and <div> is not amongst them. <ul> and <ol> both work fine, even if it's not being used for its intended purpose.
<dl> would be an appropriate element to use, but it's not supported as a wrapper element and has the same problem as using <div>, so this is an imperfect solution.
There is practically no documentation in Draftail regarding using the wrapper. If you know of a better solution, I'd be happy to hear from you!
Add the front end list item styling
To begin with, I'll define the css for each code block without the wrapped padding (replace the var values with those for your own site):
.code-block {
  font-size: var(--font-size-6);
  font-family: var(--font-family-monospace);
  text-align: left !important;
  color: floralwhite;
  background-color: #272822;
  padding: 0;
  line-height: 1.6;
}
This gives us text formatted as:
Padding between the lines is twice the beginning and end since both top and bottom spacing are applied for contiguous lines.
Define the wrapper style
We can add a wrapper class to apply to the enclosing <ul> tag:
.code-block-wrapper {
  background-color: #272822;
  padding: 0.8em 1.2em;
  margin-bottom: 0.8em;
  border-radius: 0.4em;
}
Here we have some padding to add the coloured background around the blocks of code, a bottom margin to apply spacing before the following element, and a little border radius to soften the corners.
Define the editor block style
That's the front-end styling done, but we need to add a style to the editor css to tell Draftail how to render this in the editor. Unfortunately, the wrapper doesn't get a class in the editor, the best we can do is format the code-blocks with some padding to emulate the final format:
.Draftail-block--CODE-BLOCK {
    font-family: var(--font-family-monospace);
    font-size: var(--font-size-6) !important;
    text-align: left !important;
    color: #f8f8f2;
    background-color: #272822;
    padding: 0.5em;
    line-height: 1.2;
}
Register the feature
With that in place, all that's left is to register the block type using the register_block_feature function defined in Part 2.
We need to register a custom icon with Wagtail to use with the feature. The following gives us the icon :
<svg
   id="icon-code-block"
   viewBox="0 0 1024 1024"
   fill="none"
   xmlns="http://www.w3.org/2000/svg"
   xmlns:svg="http://www.w3.org/2000/svg">
  <path
     d="M 384.01977,665.57283 230.4435,511.99742 384.01977,358.42201 m 255.96046,0 153.57628,153.57541 -153.57628,153.57541 m 87.02653,307.15082 H 296.99321 c -86.01294,0 -129.0143,0 -161.86938,-16.73971 C 106.22589,941.26121 82.733841,917.76926 68.010995,888.87149 51.271181,856.01657 51.271181,813.01548 51.271181,727.00302 V 296.99184 c 0,-86.01042 0,-129.01563 16.739814,-161.86695 C 82.733841,106.22763 106.22589,82.733658 135.12383,68.009875 167.97891,51.271177 210.98027,51.271177 296.99321,51.271177 h 430.01355 c 86.01093,0 129.01637,0 161.86786,16.738698 28.89741,14.723783 52.3915,38.217755 67.11537,67.115015 16.73883,32.85132 16.73883,75.85653 16.73883,161.86695 v 430.01118 c 0,86.01246 0,129.01355 -16.73883,161.86847 -14.72387,28.89777 -38.21796,52.38972 -67.11537,67.11245 -32.85149,16.73971 -75.85693,16.73971 -161.86786,16.73971 z"
     stroke="currentColor"
     stroke-width="102.384"
     stroke-linecap="round"
     stroke-linejoin="round"
     style="stroke-width:102.384;stroke-dasharray:none" />
</svg>
And in my wagtail_hooks.py, register with:
@hooks.register('register_rich_text_features')
def register_code_block_feature(features):
    register_block_feature(
        features=features,
        feature_name='code-block',
        type_='CODE-BLOCK',
        description='Code Block',
        css_class='code-block',
        wrapper='ul class="code-block-wrapper"',
        icon='code-block'
)I leave off role="list" from the <ul> wrapper definition in this case as I'm not defining a working list. You could use role="presentation" to explicitly tell assistive readers that the list is not to be considered a list.
In the front end, this renders our 3 lines of code with:
- Code line 1
- Code line 2
- Code line 3
And html:
<ul class="code-block-wrapper">
    <li class="code-block" data-block-key="....">Code line 1</li>
    <li class="code-block" data-block-key="....">Code line 2</li>
    <li class="code-block" data-block-key="....">Code line 3</li>
</ul>
As before, don't forget to add 'code-block' to the features list for your editor to use this in your rich text blocks.
For the most part, I use a dedicated code block with syntax highlighting powered by highlightjs, but there are occasions that I want to include a block of code directly in a text block.
This example serves as a good proof of concept for other grouped block styles you might want to add.
Conclusion
In this article, I showed the limitations around creating custom list styles in Draftail, and how you can achieve a workaround that will create a single tier list.
I also showed how you can use the wrapper to apply styling around a group of consecutive elements of the same style, even if they are not necessarily list items.